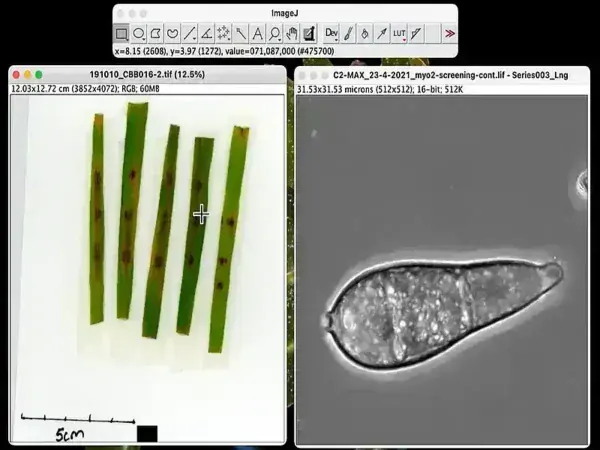
Free USB Microscope Software: ImageJ is an open source, and highly versatile image processing and analysis software. While it's not specifically designed for USB microscopes, it can be used for this purpose by capturing images from your microscope and analyzing them with its powerful tools.
ImageJ: A Free USB Microscope Software

Detailed Specifications:
- Authors Website: Project Page
- Developer: National Institutes of Health (NIH)
- License: Open Source (GPL)
- Extracted File Size: Approximately 10 MB
- Release Date: Updated regularly (visit the official site for the latest version)
- Supported OS: Windows, macOS, Linux
- Rating: ★★★★☆ (4 Star - widely used)
Some of its Key Features Include:
- Cross-Platform: Runs on Windows, macOS, and Linux.
- Portable: No installation required; just extract the ZIP file and run the application.
- Plugins: Extensible with plugins to enhance functionality, including support for live video from USB devices.
- Image Analysis: Tools for measurement, particle analysis, edge detection, and more.
- Supports Many Formats: Can open, process, and analyze almost any image format.
Why Use ImageJ for USB Microscopes?
ImageJ stands out as an excellent free USB camera software that is suitable for anyone working with USB microscopes. Its freely available open source nature, extensive plugin support, and compatibility across platforms make it an excellent choice for capturing and analyzing microscope images. Whether you're a hobbyist, educator, or researcher, it can provide a robust, free solution for enhancing your microscopy experience.
With its flexibility and a thriving community of developers, it continues to evolve, offering new ways to streamline and expand your imaging workflows. If you're looking for a reliable and portable software to complement your USB microscope, this is a tool well worth exploring.
How to Use ImageJ for USB Microscopes
ImageJ is a free, open source image analysis software that can be used with USB microscopes. Follow these steps to set it up:
Step 1: Download ImageJ
Visit the official website and download ImageJ for your operating system. Extract the contents of the ZIP file to a convenient location (e.g., on your USB flash drive for portability).
Step 2: Install the Live Video Plugin
- Download the WebCapture plugin.
- Place the downloaded JAR file in the ImageJ
pluginsfolder. - Restart the program to activate the plugin.
Step 3: Connect Your USB Microscope
Ensure your microscope is plugged in and recognized by your computer. Most USB microscopes that are UVC compliant should work.
Step 4: Start Live Capture
- Navigate to Plugins > VideoCapture > Start Capture.
- Select your USB microscope from the list of available devices.
- Position your microscope for the desired view.
Step 5: Capture and Analyze Images
Use the live feed to capture still images, then analyze them using the utilities powerful tools. For example:
- Measurement: Measure distances, areas, and angles.
- Filters: Adjust brightness, contrast, or apply smoothing.
- Particle Analysis: Count and analyze objects in the field of view.
For advanced features, explore additional plugins and macros to customize your workflow and get the most from this tool.
Alternatives to ImageJ
While ImageJ is a powerful and completely free portable USB microscope software tool for image analysis, it may not be the perfect fit for everyone. If you're looking for a portable alternative tailored to your specific needs, consider these options:
- Micam – A straightforward, lightweight USB camera software solution focused on basic image capturing and measurement. It's fully portable, requires no installation, and is ideal for users who just need a simple tool to capture and analyze microscope images.
- VirtualDub – A great choice for video recording and processing. Though not specifically designed for microscopes, it can handle live video capture with the right setup. Fully portable and widely used for video manipulation.
Comparison Chart:
| Feature | ImageJ | Micam | VirtualDub |
|---|---|---|---|
| Portability | Yes | Yes | Yes |
| OS Compatibility | Windows, macOS, Linux | Windows Only | Windows Only |
| Live View Support | Yes (with plugin) | Yes | Limited |
| Image Capture | Yes | Yes | Yes |
| Video Recording | No | No | Yes |
| Built-in Measurement Tools | Yes (Advanced Analysis) | Yes | No |
| Plugin Support | Yes | No | No |
| Advanced Image Editing | Yes (Filters, Analysis, Macros) | No | No |
| Supports USB Microscopes | Yes (with plugin setup) | Yes | Yes (with some setup) |
| Best For | Scientific Image Analysis & Processing | Microscope Image Capturing & Measurement | Video Capture & Processing |
Each of these software options offers different strengths, so consider what features are most important for your work. Whether you need a simple way to capture microscope images, a tool for video processing, or a fully customizable experience, one of these free and portable solutions should meet your needs.
Final Thoughts
Choosing the right free USB microscope software depends on your needs. ImageJ is a free open source USB camera software utility with advanced image analysis capabilities, making it ideal for researchers, educators, and hobbyists. However, if you're looking for portable alternatives, there are a few other great options to choose from too.
